KopiKetan BLOG Adobe Photoshop is a powerful photo editing software that lets you create, retouch, and remix your photos.
Photoshop Infographic Design Tutorial – By Adi Farmer | Thursday, April 4, 2013 | Printing, TPI Solutions Inc, Graphic Design, Multimedia, Infographics, Adobe Creative Suite
At TPI Solutions Inc, we use a variety of programs every day to design and output files for print and the web. Each program has its own strengths, and it’s important to choose the right program based on your goals. Below is an infographic highlighting the best ways to use Adobe InDesign, Illustrator, and Photoshop. For a detailed explanation of these programs, see our previous blog post: InDesign, Illustrator, Photoshop, which program should I use?
Photoshop Infographic Design Tutorial
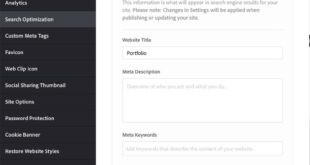
Posted by Topic Graphic Design (102) Printing (62) TPI Solutions Inc (42) Digital Printing (36) Printing (34) Graphic Designer (33) Typography (30) HP Indigo Press (28) Inspiration (27) Holidays (26 ) ) Printing Company Blog (22) Color (19) Logo Design (19) Adobe Creative Suite (17) Infographics (17) Paper (17) Photos (17) Printing Company (16) Illustrations (14) Cards (13) After You Print (13) ) ) ) TPI Solutions (11) Marketing (11) Design (10) Wedding Invitations (10) CMYK (9) Customer of the Month (9) Print Marketing (9) Type ( 9) Fonts (8) Posters (8) #Typeface Tuesday (7) Pantone (7) White Ink (7) Calendar 2023 (6) Christmas (6) PMS (6) Type Tuesday (6) Valentine’s Day (6) Multimedia (6) Digital on Demand (6) ) Print Media (6) ) Tutorials (6) Other Data Printing (6) Branding (5) Christmas Cards (5) Greeting Cards (5) Local Printing (5) Quizzes (5) Price Request (5) ) Spring (5) Wedding Printing (5) St. Patrick’s Day (4) Bleeding (4) Commercial Printers (4) Digital Printing Services (4) Fun Facts (4) Infographics (4) Packaging Design (4) Seasons (4) Independence Day (3) Boston Marathon (3) ) QR Code (3) Advertising (3) Books (3) Environment (3) Autumn (3) Family Printing Company (3) High Quality Digital Printing (3) History (3) ) Invitations (3) ) Large Posters (3) Save Money (3) Personalization (3) Self-Publishing (3) #throwbackthursday (2) Awards (2) Boston Strong (2) Mohawk Panoramic Paper (2) RGB (2) Headline Audition (2) Calendar (2) Personalized Printing (2) Wedding Day Printing (2) Finishing (2) Free Guide (2) Graphic Design Trends (2) ) Illustrator (2) Mail (2) Mohawk Superfine (2) Note Cards (2) PDF File(2) Photoshop (2) ) Printed Stationery (2) Printer Wonderland (2) Program (2) Shark Week (2) ) Local Shops (2) Style Sheets (2) Tips (2) Videos (2) ) Wedding Invitation Printing (2) Winter (2) Women in Business Enterprise (2) 2021 Calendar (1) Academy Awards ( 1) Bleeding (1) Boston (1) Boston Red Sox (1) COVID-19 (1) Cinco de Mayo (1) Earth Day, Environment (1) Father’s Day (1) Hanukkah (1) Images Resolution (1) Mother’s Day (1) Nift (1) Offset Printing (1) Opening Ceremony (1) Oscar (1) President’s Day (1) TPI Headshot (1) Thanksgiving, (1) Same Fund (1) ) Salvation Army (1) Art Print (3) Artwork (3) Back to School (4) Baseball (4) Bookbinding (6) Business Card (6) Canvas Print (6) Car Magnet (6) Celebration Magnet (1) ) Chocolate (1) Color Palette (1) Links (1) Custom Party Decorations (1) Cutouts (1) Direct Mail (1) Download and Print (1) Easter (1) Envelopes (1) ) Event Signs (1) ) Family (1) Film (1) Foil Stamping (1) Food (1) Food (1) Frosty the Presser (1) Groundhog Day (1) Halloween (1) How-to (1) InDesign (1) Integrity (1) ) Journal (1) Kickstarter (1) Local Artists (1) Menu (1) Metallic (1) Blog Mom (1) Movies (1) New England Patriots (1) Nonprofits (1) Notes (1) ) Positive Thinking (1) Mailing (1) Postcards (1) Packaging Printing (1) Printing Materials (1) Portrait Printing (1) Printing for Artists (1) Printing for Theater (1) Printing Management (1) ) Print Terminology (1) Quotes (1) Resources (1) Scanning (1) Short Run Production (1) Small Business (1) Social Distancing (1) Specialty (1) Stock Photography (1) Stop Motion Animation (1) ) Street Art (1) Summer (1) Summer Theater Program (1) Super Bowl (1) Vintage , (1) Watercolor Artwork (1) Winter Festival (1) See all
Most Used Design Resources Infographic
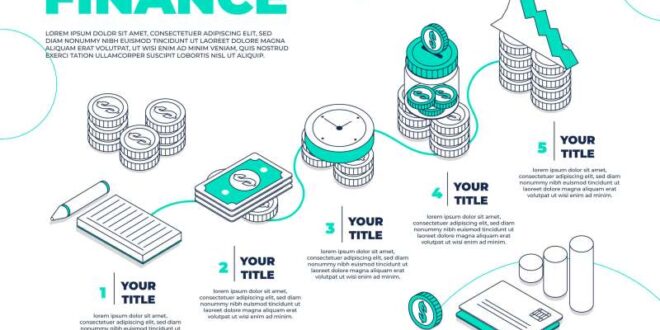
December 2023 (1) November 2023 (1) October 2023 (1) August 2023 (1) July 2023 (1) June 2023 (1) May 2023 (1) 2023 April 2023 (1) March 2023 (1) February 20231) January 2023 (1) January 2021 (1) July 2020 (1) April 2020 (1) March 2020 Month (1) February 2020 (1) May 2019 (1) April 2019 (1) July 2018 (1) March 2018 (1) February 2018 (1) January 2018 (1) December 2017 (2) November 2017 (1) October 2017 (1) September 2017 (1) August 2017 (1) July 2017 (1) June 2017 ( 2) March 2017 (2) February 2017 (2) January 2017 (1) December 2016 (1) October 2016 (2) September 2016 (1) August 2016 (1) ) July 2016 (2) June 2016 (2) May 2016 (1) April 2016 ( 4) March 2016 (1) January 2016 (2) December 2015 (3) November 2015 (1) September 2015 (2) August 2015 (2) July 2015 (1) June 2015 (1) May 2015 (1) April 2015 ( 1) 2015 March 2015 (2) February 2015 (2) January 2015 (1) December 2014 (1) November 2014 (1) September 2014 (2) August 2014 (1) 2014 July (2) June 2014 (2) May 2014 ( 1) April 2014 (3) March 2014 (3) February 2014 (1) December 2013 (2) October 2013 Month (1) September 2013 (2) August 2013 (1) July 2013 (2) June 2013 (1) May 2013 (1) April 2013 (2) March 2013 (2) February 2013 (3) January 2013 (3) December 2012 (3) November 2012 (1) October 2012 (3) September 2012 (2) August 2012 ( 1) July 2012 (1) June 2012 (3) May 2012 (1) April 2012 (2) March 2012 (4) February 2012 (2) January 2012 (3) ) December 2011 (3) November 2011 (2) October 2011 (3) September 2011 (2) August 2011 (1) July 2011 (1) June 2011 (3) May 2011 (1) April 2011 (2) March 2011 (1) February 2011 (2) January 2011 (3) December 2010 (2) November 2010 (2) 2010 September 2010 (2) August 2010 (1) July 2010 (3) June 2010 (5) Show all Do you want to learn how to create infographics quickly and easily? In this tutorial, you will learn how to create infographics quickly and easily. Learn how to create impressive, colorful 3D infographics. In less than 5 minutes, you’ll have a professional-looking infographic that looks great. If you’re not confident in your skills, you can download the final source file and modify it to suit your needs.
This tutorial is also available as a video with subtitles. If you want to see it like this, do this:
Perhaps you’ve already chosen a topic for your infographic and are ready to visualize your ideas, or maybe you’re interested in practicing your skills. Either way, after you complete this tutorial and proofread your infographic, you’ll be able to use it for marketing, education, PowerPoint presentations, and many other purposes.
Select any parameter. For this tutorial, we chose to create an infographic with a width and height of 1000 x 1000 pixels, so the final template will be square.
Online Infographic Maker
On the canvas, use the Rectangle Tool (U) to create a square shape. Then select the bottom two corners with the Direct Selection Tool (A).
A small dot appears at each corner. Drag each diagonally to the square to round the bottom corners, as shown in the second image below.
The next step is to widen the path. To do this, open the Pathfinder panel and select the Combine icon. Next, you need to reduce the height. Just drag the selection from bottom to top. The result will look like the shape shown in the first image below.
Then you need to duplicate the shape and flip it. To do this, copy the path with Ctrl+C and paste it above the selection with Ctrl+F. Rotate the path 180 degrees using the Rotate Tool (R) and move the new path up slightly to overlap the two paths. The results are shown in the second figure below.
Create Compelling Infographics From Scratch
Create an ellipse using the top shape created in the last step. Duplicate this shape, hold down the Shift key, and move it to the right. Duplicate this and rotate it 180 degrees like the previous path.
Next, go to Pathfinder and click on the intersection icon. The result should look like the third image.
Return to the previous shape (should be on the left side of the canvas). There are still two paths included. Select them and merge them. Next, change the tone. I chose a slightly darker, more saturated pink, so the end result is a pink ring with light and shadow.
Duplicate the oval on the right. Paint with the same dark delicacy, toning it down a bit. This will make the ring thicker.
Master Hot Design Trends With These Photoshop Tutorials
Select the inner oval (the one with the darker shadow) and duplicate it twice to create two copies. Select one of the copies and move it down. Then select both and click on the intersection.
We need to create a new path inside the circle. Change that color to the background color and make it transparent. Select it, open the Eyedropper Tool (I) and click on the background.
Go