 KopiKetan BLOG Adobe Photoshop is a powerful photo editing software that lets you create, retouch, and remix your photos.
Perspective Distortion In Photoshop – Image distortion is an inevitable feature of all modern images due to the limitations of lens technology and the nature of the laws of physics. With continuous progress in mathematical modeling and measurement of different types of lenses in digital cameras, solving various image distortion problems in the digital realm has become much easier. However, there are still situations where you cannot trust automatic defacement removal tools and should try to fix the problem manually. Remember, there is no such thing as a 100% distortion-free image.
For example, cell phone cameras may have completely unknown lenses and specifications (you may not know how to check and measure the accuracy factor). In addition, several stitched images combine panoramic images to create new “virtual lenses”, completely unknown and more complex distortion patterns that cannot be corrected using automatic distortion removal tools.
Perspective Distortion In Photoshop
Scientifically known as negative (concave outward) or positive (concave outward) curvature, the reverse process or removal of optical distortion is known as quadrature correction.
How To Use Perspective Warp In Photoshop (step By Step)
For basic types of distortion, Photoshop’s factory-built tools are sufficient to correct. Third-party plugins are recommended for complex distortion models.
Note: All distortion tools can be used destructively as well as constructively. When you add curve distortion, fast motion, dynamics, movement, etc. to your images, sometimes you get interesting and interesting results.
There’s also a “Dole Pan” conversion tool, though it’s limited to local and specific anomalies, and we definitely don’t recommend it for general use unless you want to experiment. It is definitely more powerful for different types of distortion, however, it requires careful preparation and patience.
Note: To use all of Photoshop’s built-in conversion tools, your image layer must be locked. Open the Layers tab (or press F7 if you can’t find it) and double-click on your “Background” image layer to open it. Once another option is selected with the mouse, right-click and check the first option “Layer from Background…”. Rename it as you like (the default name is Layer 0) and press OK.
How To Use Perspective Corrections In Lightroom And Photoshop
When it comes to distortion removal plugins, you’ll find many titles, however, our selection narrows down to just 2 names in the business:
The PT lens is highly sought after due to its large camera database and ability to automatically remove barrel/puncture distortion. There’s a good chance your model is already supported in your database. There’s also a manual distortion removal section that’s marginally better than Photoshop’s built-in lens correction tool (if you can’t find a preset for your lens’ performance and transmission parameters). In fact, for everything else, we believe the built-in tools are actually better for the job.
A PT lens cannot automatically detect the perspective, distortion type, and complex/mixed type distortion that you find in fisheye and panoramic images. For this you have to manually edit all the images.
After opening an image in Photoshop, you run the ePaperPress PT Lens plugin through the Filters menu. Your photo must have EXIF data and your camera/phone model must support it. The PT lens automatically reads and recognizes EXIF data, automatically adjusting and applying automatic barrel/puncture correction. All you have to do is press the “OK” button to fix the barrel/puncture distortion!
Perspective Correction Explained
Other types of distortion (growth / change of perspective / etc.) must be corrected manually with PT lenses or with built-in Photoshop tools and other plugins.
Panorama Character is our recommended plugin for Photoshop because it allows you to correct highly distorted images with complex distortion patterns. It’s primarily used for panoramas, but we’ve found it useful for other precise and simple corrections, especially perspective, barrel/pinhole, and skew distortion.
Panorama correction isn’t perfect and can’t fix impossible distortion patterns, but it’s pretty close to a perfect distortion correction tool to have in your arsenal.
For example, the panorama character is mostly useless for macro nature/wildlife photography and semi-manual correction, because you don’t have a reference point to draw the lines from. If you do – great! – and that would be awesome (as we show in our third video below). However, in reality, for example, if you photograph real objects, you can only guess. On the other hand, if you are photographing geometric objects, it will be completely shiny. However, training and experience can be very helpful in such cases.
How To Fix Perspective Distortion In 90 Seconds
Before applying corrections with the Panorama Character plugin, it’s always good practice to select the image you want to modify (if it has multiple layers), resize the canvas appropriately, and set the image to High Definition. Zoom with quality resizing algorithm.
1) Always enlarge the image before processing. Obviously we skipped this step in our video tutorials to save CPU/RAM. You can also use third-party zoom/resize tools like BenVista PhotoZoom Pro and the S-Spline Max Precision algorithm (our favorite). As Machine Learning Algorithms / Neural Networks / Artificial Intelligence become mainstream, you can try them too (eg TensorZoom) – it all really depends on the source material and training models.) 2) CANVAS size placement to increase some work 3) Always on simple 2-point or 3-point lines Start, later you can go to Bezier curves for fine adjustments 4) Adjust the sliders to get the appropriate W/H [Width/Height] aspect ratio (linear coefficients ) 5) Curves of correction lines (horizontal and vertical) should not be cut! The program cannot fix such images, so we need to go back to the previous step and fix it. Remember that horizontal lines do not touch top and bottom and vertical lines do not touch left and right. You must either limit them to the image, or enlarge the canvas and drag them into the virtual image area. Perspective correction in Photoshop
Perspective shift is the most common image distortion that occurs when photographing buildings, cityscapes, architecture, etc. This is because you have limited room to move away from the object you’re trying to capture, and you end up with jagged edges/lines and a “collapsing building” illusion due to lens distortion.
How to fix “collapsing buildings” distortion with Photoshop? How to smooth architectural images, curved buildings and cityscapes in a few simple steps? After opening your image in Photoshop, follow these steps to quickly fix your image:
How To Quickly Use Photoshop To Correct Severe Distortion For Perfect Panoramics
Increase the size of your image canvas (work area) to gain some editing space. This is always a good idea when working with the Perspective Transformation tool in Photoshop.
Unlock your image layer (if you can’t see the Layers tab, press F7 on your keyboard or highlight Window > Layer in the top menu)
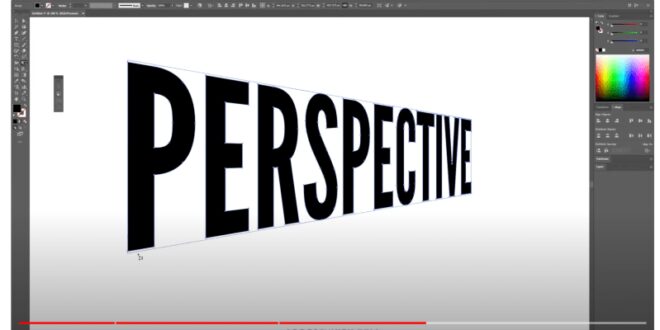
Select the Edit > Transform > Perspective tool and adjust the points/frame as best as possible to correct the angle of the image.
When you are done and happy with the final result, press the cross circle above or next to cancel all changes/edits.
Fish Eye Correction Using Photoshop Adaptive Wide Angle
Tip: You can press ESC (Escape) on your keyboard to cancel all edits and exit any transform tool.
That sounds good! Now all we need to do is remove the white space from the image and save it as a new file (see our video tutorial for more details).
For more information on how to distort an image with Photoshop.by Scene Bagshow and how to fix it, watch the entire video tutorial series. June 18, 2020 | Composition , Image Processing , Photography Software , Photoshop , Shaun Bagshaw , Video Training 0 Comments
In this tutorial, I’ll show you how to fix a common problem in landscape photography, the downward tilting image defect when using a wide-angle camera lens.
Perspective Distortion In Photography: Exploring Optical Illusions
A common and effective compositional technique is to sweep wide-angle scenes with close-ups and mid-subject leading into the distance, such as trees, sea stacks, or mountains.
We often tilt the camera down to get closer to the foreground, and move the horizon to the upper third of the frame, which tilts objects outward.
Lightroom and other programs have tools that can correct some camera tilt, but they tilt the entire image, changing the foreground and cropping the composition we want.
Fortunately, Photoshop has extensive transformation and enhancement tools that allow us to correct the perspective of the top of the image while leaving the bottom of the image as intended.
How To Quickly Fix Perspective Distortions In Photoshop
I hope you can use this technology well. Let me know if you have any questions or ideas to add.
My new video course Photoshop Essentials for Outdoor Photographers teaches these techniques and more. It contains approximately 9 hours of lessons to help nature photographers master Photoshop and make the most of its advanced features. More information can be found here. Use code PSessentials25 until June 2020.
Sean is an outdoor photographer, digital image processing enthusiast, and photography instructor based in Ashland, Oregon, where he lives with his wife and two sons. Her previous career as a science teacher makes teaching photography a perfect fit. Sean has led workshops with other members of Photo Cascadia. He also teaches digital imaging.


