KopiKetan BLOG Adobe Photoshop is a powerful photo editing software that lets you create, retouch, and remix your photos.

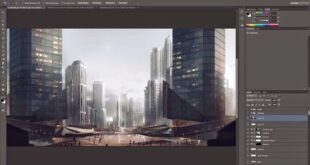
Realistic Lighting Effects In Photoshop – Good lighting and sunlight can add interest and drama to photos – but you need a good photo to achieve that.
For the best results, use pictures that reflect the sun (or other light). Our example shows the subject in the forest, lit by the sun. This is a good place to build solar panels. Once you’ve chosen the image, analyze the light to get a better idea of where the light should go.
Realistic Lighting Effects In Photoshop
You don’t need complicated equipment to start creating a good lighting system. Start by creating a new level.
Photoshop Fx Library Pro
Then use the Brush Tool to draw a thin white line through the path you want to highlight. Focus on keeping the lines simple and effective, and make sure they flow smoothly.
Also, you don’t have to be special. He will focus more on implementing the next steps.
Now that we have the basics of lighting, we can start doing it properly. First, we start by adding a blur so that they really blend in with the environment.
Before you begin, right-click on the Layer you made the rays from and choose Convert to Smart Object. This will allow us to add filters and effects to the layer as we can go back and change the settings at any time.
Add Brilliant Light Effects To Your Work With Photoshop
The Radial Blur dialog will open. Set the Blur Method to Zoom. Now you can set the point where the blur will appear. It should be placed above the light in the image.
Since we can’t see what will happen at that time, you should go back and redo this article if it doesn’t follow the right path.
Apply Radial Blur and see the effect. Check the direction of the light and make sure that the vision is not connected to the main light.
For a simple preview of what the effect looks like, place the Solid Color Tool Set Black under Light Ray.
Vector Realistic Starburst Lighting Effect, Yellow Sun With Rays And Glow On Transparent Background Stock Vector
If you want to go back and make some adjustments, just double click on the Radial Adjustment Layer Smart Filter under Layers.
It will help to simulate the effect many times called quality. To do so, open Filters and click on the Recently Used Filters button at the top of the list.
Now that the shadows look good, let’s focus on changing the color of the light. Because the sun is low, we want a nice golden color.
The area we are going to paint will be the light source that we can work with in the Layers layer. The Leveling Level is the one that really gives the final lighting effect.
Photoshop Photo Effects For Stunning Creative Photos
To change the color of the light, we must first choose the light. To do this, hold down ALT or OPTN and click on the light line.
This will make the selection close to the contents of the range. Now we can load this option on the Layers panel.
Make a Change Part above the light source. Note that since we have a strong option, it is automatically included in the Cover Process.
Hide the original glow we created with the Brush Tool. We won’t need it anymore.
How To Add Light In Photoshop: 5 Methods
The framework allows you to change the features and shadows in an image or line. Also, you can choose custom colors of your choice as well. This is what will help us turn the white line into noise.
From the red channel, move the shader to the right to change the color and appearance of the light.
Now do the same thing but on the green line. Be sure to switch between them whenever you need to call for quality. The color should match the color of the light in the picture as much as possible.
Now that the main effect is finished, we can put on the last part to make it look as good as possible.
Photoshop Lighting Effects
The lights can also be explained a little. To fix, copy Settings.
Using a simple brush, put it down, drawing on the Layer Mask of the new Adjustment layer to add width, smoothness and softness.
Even Gaussian Blur can help to give a nice effect with continuous images.
Finally, we need to add noise to the light rays. Because noise is present in all images, the absence of visible noise in our work is an indication that it is fake.
Generate Aitana Lopez Style Ai, Editing, Filters And More. How To Get The Same Real Resolution And Light Effects?
Click on one of the Edit options, open the list of filters, select Noise, and Add Noise. Adjust the noise to match the noise in the original image as much as possible.
And you’re done! Real sunlight is combined with natural light in the image. Learn how to add fire effects to photos using free images, Blending Modes, Layer Masks, and other Photoshop tools!
The special effects come from using real images to create them. That’s why we’re going to show you how to add fire to your pictures using free real fire pictures.
Combining fire images with other images is an easy process, but you will need a good image to download. The first thing to consider is that fire is light, and it should emit light wherever you add it.
Create A Glow Effect In Photoshop
We chose a background that had lights that worked well for the fire. Just remember this point if you’re taking your own photos: it’s easier to use the right lighting than trying to do it from scratch in Photoshop. (But it can be done, and we show you how in our PRO class How to Create Glowing Effects in Photoshop!)
As for fire, it is very easy to find free images that will be used. All you need is a fire image on a black/dark background.
If you have a good photo ready, the final effect is a piece of cake! Let’s see how it works.
Many of these effects are achieved using one tool: Blending. By setting the fire image to match, you can make the background dark while leaving the fire visible.
Lens Flares Pack Photoshop Realistic Light Free 17204297 Vector Art At Vecteezy
We’ve decided to create a fire image in the Screen mode. This makes most of the dark part invisible but, as you will see, it is not completely visible.
The display’s blending mode only makes the blacks look dull. To remove the darkness around the fire, we must change the darkness.
You can do it with Framework. With the fire selected, press CTRL or CMD+L and move the dark hole to the right. This will turn the dark parts of the image into black, making them less visible with screen activity.
Guess what? It’s really good! Now we just need to make the fire appear exactly where we want it to go. It’s easy to use with the Brush and Layers tools.
Realistic Neon Light Effect In Photoshop (everything Explained!)
Just use a soft, rounded Brush set to Flow and paint with a black color from the Layers.
This will help you control where it appears. Just make sure that the flame controls the image well enough and is clear!
That’s it for the main answer, but there are still some things we can do to improve the quality of the fire.
When in doubt, add fire! If you want to enhance the quality of the fire, or give it texture and density, it is easy to add other effects from the image.
Creating Realistic Starburst Effects In Photoshop
Here, we’ve taken a second image of the fire, but instead of using the entire fire, we’ll paint a small part of it to complement the original result.
Place the second fire image where you want it, add a Layer Mask to the layer, and fill it with black to make it invisible. Now, using the same Brush as before, paint white paint to highlight the front and surround the first light.
This will help you close gaps, add additional images, and improve overall results.
As we said before, we chose an image that has light that can be used in the fire, but that doesn’t mean we can’t add more environment.
Realistic Light Brushes For Photoshop On Yellow Images Creative Store
Add other fire effects, create new parts, paint on fire, and use the paint tool.