 KopiKetan BLOG Adobe Photoshop is a powerful photo editing software that lets you create, retouch, and remix your photos.
Beauty Retouching Techniques In Photoshop – Portrait retouching is one of the photo editing services that requires a lot of expertise. Most of the time, people only see perfect pictures. But not all post-processing methods are.
This type of photo retouching is widely used in many industries. The fashion, retail and corporate worlds require a lot of portrait retouching. High quality product photos/images are one of the most important and versatile assets your business should invest in. Retouching and editing images is just as important in digital photography as photography.
Beauty Retouching Techniques In Photoshop
If the head photo editor doesn’t have the best skills to retouch the perfect head. Can you imagine what these industries would be like without these photo editing services? The people responsible for this company rely on customized images to impress customers and clients.
Beauty Retouching At A Glance
The following guide offers a series of simple procedures for using simple techniques to achieve natural looking portrait photos. Remember: when you’re aiming for a natural look, you want your true beauty to shine through. It is necessary to preserve the integrity of the face, the features of the face and the clarity of the image.
The most important feature of a portrait is the subject’s eyes. Highlight the irises and separate them.
The contrast and color of the iris can be increased to give the eyes extra impact. A radial filter is ideal for achieving this goal. Select the Camera Raw or Lightroom or Photoshop CC Camera Raw filter and select Radial Filter from the Tools menu.
Then, remove the outer parts with a brush until everything on the iris is covered. On the Radial Filters tab, lower the exposure to make the iris darker. Adjust the brightness, saturation and exposure until you get the result you want.
Tips For Retouching Skin In Photoshop That You Need To Know
Darken the edges a little to make the iris stand out. Find the eraser tool and remove the center of the circle. Leave the edges dark.
Tip: After perfecting the first iris, hold Ctrl/Command + Alt and then drag the pins over the other eye. This step transfers and uses the second iris.
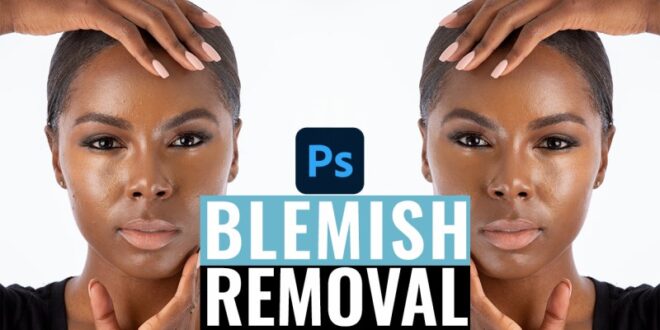
The first step is to remove the skin. Get rid of all blemishes, ugly spots, and unwanted blemishes. Use the spot manipulation brush and the clone stamp tools to do this. Press Ctrl/Command+J to duplicate the layer, then press Ctrl/Command+I.
Right-click on the layer, then select “Convert to Smart Object”. The next step is to go to the Filter tab, select Others and select High Pass. By setting the skin to a pH of 9.9. To restore the natural texture, click Filter, then select Gaussian Blur. The dark value should be a third of the value in the high filter, so for this example it’s 3.3 pixels.
Fashion Retouching . . .
Alt-click the icon to add a layer mask. This will mask the effect with a white brush. Gently shake the skin open.
Tip: Remember, a retouch doesn’t have to be perfect. To tighten the eyes, soften the skin, tighten the wrinkles, you need to repair the area. Working with layer masks allows you to do just that. After making changes to each layer, Alt-click the mask icon to hide the effects. Click again on the parts you want to see in the final image.
Hot spots are areas that appear too bright in photos. They make the face look like sweat. Of course, it is best to apply powder to the subject before shooting. However, these hot spots can also be removed using the patch tool.
A patch tool is an ideal tool for removing hot spots. Make a rough selection around hot spots. Drag it to an empty space. To make this change, create a new layer, then point the tool to Contents and select all layers in the tool options. Lower the darkness slightly for a natural glow instead of harsh light.
Dramatic Beauty Portrait Tutorial Part 3: Basic Skin Retouching
Tip: You can retouch portraits by separating layers based on the current edits you’ve made. By using a non-destructive workflow, you can reverse any error. You can make changes or effects without affecting the original photo layer. In addition, the effects are softened and a natural finish is created later.
Sharpening in the red channel is quite a feat because there is very little skin texture. When sharpening the details of the face, the skin around the details is not affected and retains its softness.
Select the red channel in the Channels panel. Then, under the Filter tab, select Unsharp Mask and then Sharpen. Settings vary depending on image resolution. These settings are great for testing: 100, Radius 3.0, and Threshold 0.
Click the RGB channel again to see what happens in the image. You can expect the image to look more detailed, but not too sharp.
Beauty Retouching Techniques
Tip: Sharpening is the only thing you do when you redo a portrait. You can record a task so that it can be displayed without having to repeat all the tasks. Select the Tasks tab, then click the Create New Task button. Click on a note, edit it, and click Stop when you’re done.
To discard and burn specific parts of the image, hold down the Alt key and then click the Create New Layer button. Name this layer “Dodge and Burn”. Change the pattern to Overlay and check the box to fill the image with a grey/neutral colour. After clicking OK, a new invisible layer will be created.
Use the brush tool to darken or lighten areas of the face. Set the Net Opacity to 10%. Try painting with black under the cheekbones and darker parts of the face. White paint to highlight the lighter areas of the face. B. Above the cheekbones, press X.
Tip: After working with the Dodge and Burn layers, select Gaussian Blur from the Filters and Blurs menu. You can use it to smooth the layers for a natural finish with a clean sweep. One of the best effects when editing portrait photos.
Basic Photoshop Beauty Retouch Using Frequency Separation, Burning And Dodging
Hair can be regenerated using the Spot Healing Brush tool. However, this tool can be complicated. Because it tends to wobble a little where the hair meets the head.
One way to fix this is to brush individual hairs using a clone stamp or healing brush. Then you can use the Spot Healing Brush tool again. Paint on the area to get a sample color, then use it to remove the bulk.
Tip: Use the Spot Healing Brush, Healing Brush, and Clone Stamp tools to scan each layer. This allows you to non-destructively take color samples and work on a new layer.
It’s easy to show eye bags or that your subject in the photo hasn’t had enough sleep.
Step By Step Guide On Photoshop Skin Retouching
Duplicate the background layer by pressing Ctrl/Cmd + J. Select the Patch Tool. To keep the natural texture, set the tool options to Normal instead of Content-Aware. Use a dark area to make a rough selection, then extend to a clean area of skin. A flawless forehead is a good source of this.
Press Ctrl/Cmd + D, then lower the opacity of the layer in the Layers panel. Play with the coverage until it reaches a natural finish. You can also move the Kone stamp to repeat the darkness up to 20% and smooth the remaining rough areas.
Tip: When reworking portraits, it’s best to work with a tablet. Using a pen allows you to be more precise than using a mouse. Program hotkeys to keep your favorite shortcuts and actions at your fingertips.
Now that you’ve learned the basic techniques for retouching portraits and photographs, you can move on to learning other techniques (from basic to advanced). Below are some resources to improve your editing skills.
The Retouching Toolkit 3.1: The Best Photoshop Plugin Gets Even Better
With the variety of Photoshop retouching techniques, there are many ways to restore photos to the highest standards. This tutorial will give you an idea of the best photoshop tricks for portrait photography.
Disclaimer: Some of the images, videos and content shared on this site are not yours. Please note that some of the images and videos we use are copyright to their respective owners. No copyright infringement intended. If you are the original owner of the images, videos and content that you share and distribute on our website and you do not want your work to be published or distributed, you must inform us of your wishes. You can email us @ email. We will delete your content and never publish it


